Curbless Shower
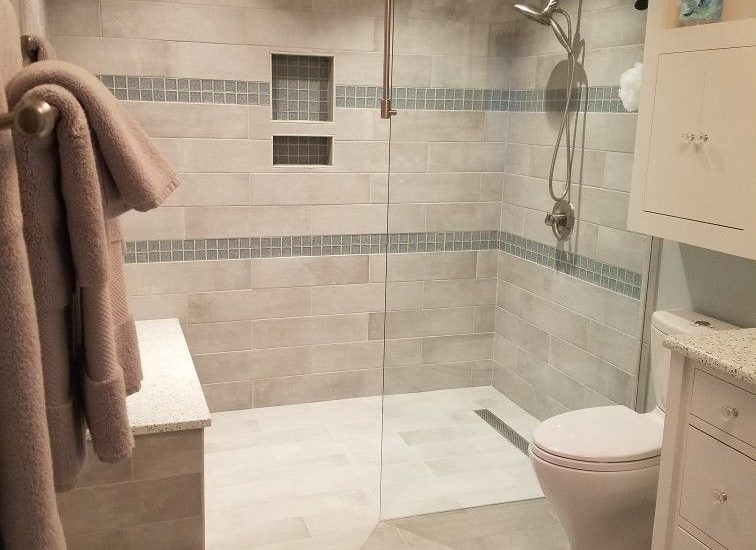
A curbless shower is just what the name says, a shower that does not have a curb or threshold. It has a seamless design without the divider between the bathroom floor and shower floor. The bathroom floor tiles will be the same all the way through the bathroom. There is no curb or disruption between the shower and bathroom floor.
A curbless shower means reduced risk of tripping, fewer edges for mold and mildew to form, and easier mobility.
Walk-in, zero threshold, and barrier free are a few of the more common names for a curbless shower.
What are the benefits of a curbless shower?
A Curbless shower has two primary benefits.
- Design
- Mobility
Design
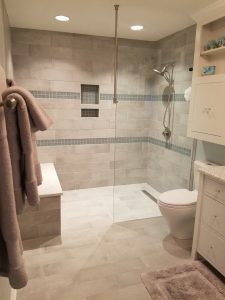 Curbless showers add visual appeal and maximize space. Removing the shower barrier (curb) allows the bathroom floor to flow from wall-to-wall. The bathroom has a seamless look with a significantly larger appearance. Curbless showers do a good job of keeping water within the splash zone if installed properly.
Curbless shower design is critical for proper drainage. A bigger shower makes it easier to have the appropriate slope for drainage. The minimum recommended size is 42-inches by 42-inches. With this size and larger, you may be able to eliminate the door.
Curbless showers are possible for a small bathroom remodel. They are not considered a luxury bathroom remodel.
Linear drains offer a sleek and stylish design for your curbless shower. Incorporating a linear drain into your shower allows for non-traditional tiling options. Always use the same consistent tile size and design throughout the bathroom. Do not set the shower or wet area apart.
Barrier-free showers are almost level with the floor. There is a transition from the bathroom floor into the shower where a gradual slope begins. This keeps the water from running outside into the bedroom and the remainder of the house.
Mobility
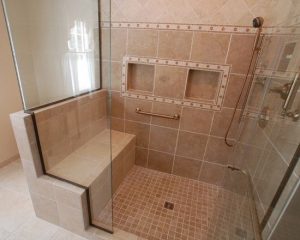 With curbless, zero-threshold, and walk-in showers, the bathroom and shower floor are flush. There is no dam. There is no sill to step over. This makes it easy for a wheelchair or walker to roll right into the shower.
Clients experiencing balance, standing, eye sight, and ease of movement difficulties will discover how welcoming a curbless shower is for them. Simply walk directly from the bathroom into the shower and sit on the shower seat. Turn on the fixtures and enjoy a wonderful, easy, and comforting bathing experience! You can even have the towel nicely stored on an easily accessible heated towel rack for warm, comfortable drying of your hair and skin. A shower niche adds even more convenience.
Many clients love the added safety a curbless shower affords. A typical shower has a 6-inch dam. Maneuvering through a narrow shower door while stepping over the curb with wet feet has caused plenty of injuries. Using oils, lotions, beauty bars, and conditioners inside the shower creates an even greater slip and fall hazard stepping over the dam and out of the shower.
Are curbless showers more difficult to build?
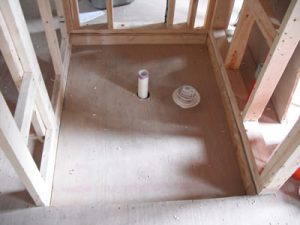
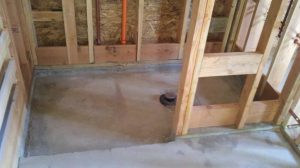
The short answer – yes. Take a look at the two pictures below.
|
|
A curbless shower requires at least a 3-inch recessed pan – sort of like a shallow swimming pool. Why? Like a traditional curb or dam shower, the pan requires 3 inches of cement in the pan so both the pan and tile does not crack from the weight of your body. Moreover, this layer of cement allows for proper slopping of the pan, so water goes down the drain and not out into your bathroom and bedroom!
There is no truly level curbless shower. Some contractors will raise the entire bathroom floor to create the 3-inch recess. This; however, creates a dangerous trip and fall hazard from the bedroom into the bathroom.
Below is a brief introduction illustrating the level of demolition for a curbless shower pan.
Wood Floors
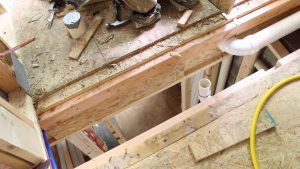 The pan for a wood floor curbless shower must be 3 inches below the top of the floor. Therefore, the joists under the floor sheeting must cut down 3 inches or the area must be re-framed using smaller joists.
The method employed depends on the type and size of joists used and what the Structural Engineer specifies. This usually requires opening the ceiling below.
This will require adjusting and lowering the existing shower drain. If there are any cables, electrical, or plumbing obstructing the reframing of the floor joists, these too must be relocated.
Concrete Floors
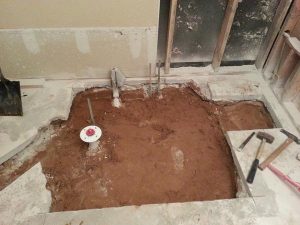 For a concrete floor curbless shower, the existing concrete must be removed along with sufficient soil. Most concrete floors are about 3-1/2 inches to 6 inches thick.
Since the pan must be at least 3 inches thick, for any concrete floor less than 6 inches, soil must be removed. Why? Consider an existing 3-1/2-inch floor. The pan must be 3 inches thick. Therefore, to get to 3 inches below the existing concrete floor, 2-1/2 inches of soil must be removed.
If your home was constructed using post tension concrete, it will take three times as long to remove the concrete and soil.
Just like a wood floor, this will require adjusting and lowering the existing shower drain. If there are any water pipes obstructing concrete and soil removal, these too must be removed and relocated.
Waterproofing a curbless shower pan
This can get tricky. You have already seen how much work is involved to build a curbless shower pan. The pan building alone will add at least several thousand dollars to your curbless shower remodel. To make the entire job more affordable, many contractors will use lesser quality water proofing methods. They do not work.
I have seen and removed many of these low quality, cheap installations after they caused significant damage to the home. How long do these methods last? Somewhere between a few weeks and 10 years. If you love to gamble and can afford to lose at least $30,000-$50,000 (first time installation plus the cost to remove and reinstall correctly the second time), use the products below. The aforementioned costs do not include the additional thousands of dollars in water damage your home will likely experience.
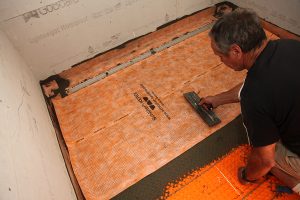
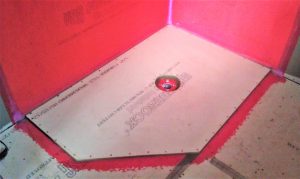
Below represents three of the most common cheap, low quality shower pan methods used today. Using any of these and your shower will leak.
|
|
|
How do I make sure my curbless shower pan will not leak?
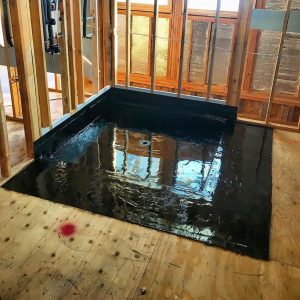
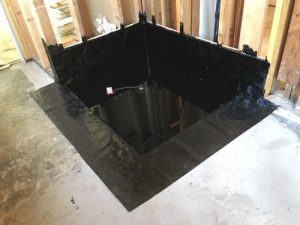
There is only one method that will not leak – a properly applied hot mop. Hot-mop shower pans have been used for more than 60 years. They have proven to be dependable and durable throughout the country. This is especially true in California. There are no folds, special pieces, splicing, or glues needed at dams, corners, laps, or seams. All areas bond together to form a one-piece unit. This is a clear advantage over vinyl and other one-piece liner methods (see immediately above). Make sure the hot mop is professionally tested and inspected before covering to ensure there are no leaks.
|
|
A shower, any shower, is essentially a swimming pool. Just like a swimming pool, the entire system must be water tight. The walls and pan must be a fully integrated, seamless system.
Do not make the mistake others have made trying to save a few dollars. Install a high quality, durable hot mop shower pan. Never use cement board, KERDI-BOARD, or a Schluter Polyethylene membrane. Do not use any of these products on the walls either! For more on this, see How Do You Remodel a Shower?
Not all hot mop companies are created equal.
 There are many hot mop companies that use a single ply system with low quality tar. Almost as important as the hot mop itself are the pan preparations performed by the hot mop company. This is a critical step.
The best hot mop will fail if the substrate is not properly installed. This includes the plumber installing the correct drain properly. Special attention must be paid on integrating the drain with the hot mop. Fail this step and the entire hot mop will break down and the pan will leak.
If your hot mop does not consist of 4 layers of high-quality asphalt and 3 layers of high grade 15 lb. felt, you are wasting your money.
Always Hire a Reliable and Dependable Contractor to Remodel your Shower
 Always work with a trustworthy contractor like DAD’s Construction. We are experts in bathroom remodeling who can manage projects in an efficient manner. DAD’s Construction will do everything to minimize the possibility of change orders. Our team will make sure we have all the necessary information to prepare a proposal that meets your requirements. Rest assured that we will provide you with a detailed, by line-item contract. We will make sure that the contents of this agreement are properly and clearly communicated to you. If you have questions or need updates regarding your project, we will always answer your inquiries.
How Can I Receive More Information on a Curbless Shower?
If you would like more information on enjoying the best bathroom, kitchen, and interior remodeling experience in Orange County, call Dan at (949) 380-0177 or at dan@dadsconstruction.com for a free in home consultation. DAD’s serves all of South Orange County California. This includes Lake Forest, Mission Viejo, Foothill Ranch, Portola Hills, Ladera Ranch, Irvine, San Clemente, Dana Point, San Juan Capistrano, Rancho Santa Margarita, Coto de Caza, Dove Canyon, Laguna Niguel, Laguna Hills, Laguna Beach, Newport Beach, and Aliso Viejo.
“Taking Care of Your Home . . . The Way We Would Our Own”
Daniel A. Derkum is the owner of DAD’s Construction. DAD’s is a leading South Orange County, California design-and-build remodeling and renovation Contractor. See https://www.dadsconstruction.com. © DAD’s Home Services & Construction, Inc. All Rights Reserved.
